Recognitions Web Component
 Deprecated. The Recognitions web component has been deprecated and replaced with the Recognitions block. While still supported, no updates or fixes are expected for web components.
Overview
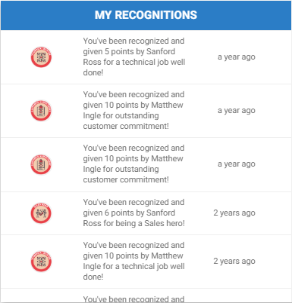
The Recognitions web component displays an interface where participants can recognize one another. Depending on your recognition setup, anyone can recognize anyone, managers recognize team members, or only people in the same group recognize each other for contributions and accomplishments and grant rewards based on a predetermined budget.
The web component has two views: a form and a list. The form is used to submit a recognition. The list shows either the recognitions the user has given or the recognitions the user has received. By default, the web component shows recognitions given along with a link to the form view. You can use multiple web component to show different combinations of information.
Recipient Lookup
The search in the "Who do you want to recognize" field is a prefix search. Typing "jo" will search for "jo*" which will match joe, josh, etc. The search supports "or" and "and", although "or" isn't necessary. Typing "jo mi"will find josh and michael in the search results. Typing "jo and fi" will find anyone with both of the letters as the beginning of words in their name, such as "josh finnis".
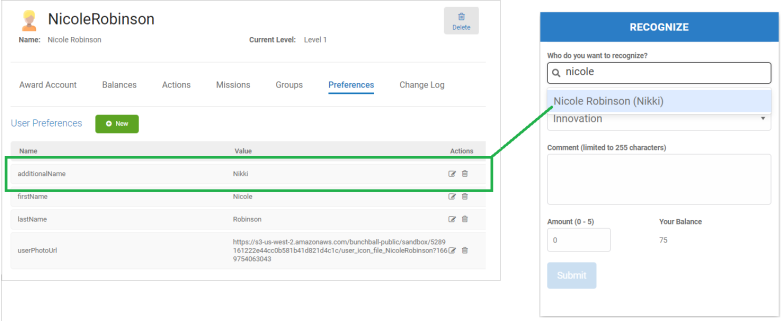
The recipient lookup searches firstName and lastName. If necessary, you can use the additionalName preference to add a preferred name to differentiate between users with the same or similar names. Show me![]()
|
|
|
|
|
|
Main view |
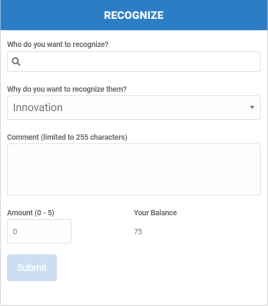
Form view with points |
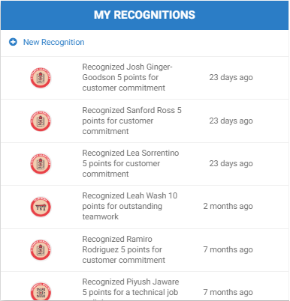
Giver view |
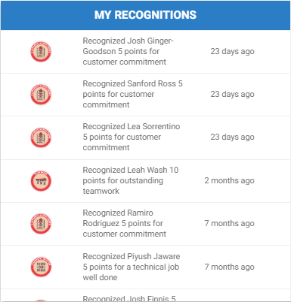
Recipient view |
Configure a Web Component
- Before adding a web component, configure recognition for your program.
- Open Nitro Studio > Integrate > Web Components.
- Click New > Recognitions.
- Enter web component settings.
Parameters are used when working directly with a web component embed tag (HTML) or editing the config.json file for Bunchball Go. - web component - set the component tag as bunchball-interaction.
- iframe - must match exactly with the name of the web component created in Nitro Studio.
- web component - Recommended. Web components improve performance due to faster loading. Height and width settings are not required as the web component will fill space on the page like any other HTML element.
- iframe - The source code is a div tag and the rendered web component will be inside an iframe.
- recipient - Shows recognitions received by the user. Uses the phrase set in the Recipient Phrase in the recognition category.
- giver - Shows recognitions given by the user. Uses the phrase set in the Giver Phrase in the recognition category.
- form - Shows the recognition submission form.
- main - Shows both the submission form and recognitions given. Uses the phrase set in the Giver Phrase in the recognition category.
|
Studio Field |
Description |
Parameters |
||||
|---|---|---|---|---|---|---|
|
Web Component Embed HTML |
Bunchball Go config.json |
Valid Values |
Required (web component) |
Required (iframe) |
||
|
Name and Display |
||||||
|
Name |
The web component name. |
name |
name |
|
No |
Yes |
|
Width |
The web component's width. |
width |
width |
relative (%) or absolute value (px) |
No |
No |
|
Height |
The web component's height. |
height |
height |
relative (%) or absolute value (px) |
No |
No |
|
Custom Styles |
The link to your custom stylesheet(s). Accepts a comma delimited list of URLs. |
|
|
|
|
|
|
Embed Type |
Specifies the type of embed code to generate. |
data-embed-type |
embed-type |
iframe |
No |
Yes |
|
Basic |
||||||
|
User ID |
The ID of the user to get recognitions for. |
data-user-id |
user-id |
|
Yes |
Yes |
|
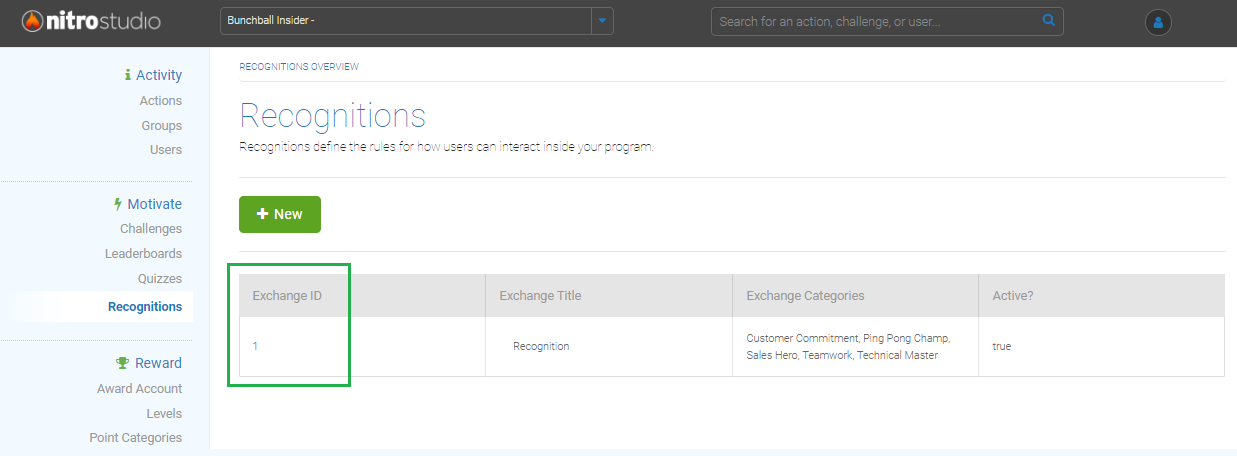
Exchange |
The name of the exchange to use for recognitions. Note: The name will be converted to the exchange ID which is used in the embed. Click the image to see where to find the exchange ID.
|
data-exchange-id |
exchange-id |
|
Yes |
Yes |
|
Return Count |
The number of items to display. |
data-return-count |
return-count |
|
No |
No |
|
View to Display |
The view the web component should render. Defaults to main. |
data-display |
display |
giver, recipient, main, form |
No |
No |
|
Title (List View) |
The title to display as the header of the list view. Defaults to My Recognitions. |
data-title |
title |
|
No |
No |
|
Subtitle |
The subtitle to display below the web component header. |
data-subtitle |
subtitle |
|
No |
No |
|
Title (Form View) |
The title to display as the header of the form view. Defaults to Recognize. |
data-form-title |
form-title |
|
No |
No |
|
Start Time |
The recognition feed's start date. Recognitions before this date will not appear in the web component. If not set, will show recognitions for the last three months. Note: The difference between the start and end time must be less than one year. |
data-start-time |
start-time |
a UNIX timestamp |
No |
No |
|
End Time |
The recognition feed's end date. Recognitions after this date will not appear in the web component. If not set, will show recognitions up to the current date. |
data-end-time |
end-time |
a UNIX timestamp |
No |
No |
|
Language |
Add a language code to preview the web component in a Nitro supported default language. Default languages are: en, de, hi, zh, it, es, and fr. |
|
|
|
No |
No |
|
Custom Language Reference |
Add a language code and then add a custom translation key to the browser console to preview the web component in a non-default language. |
|
|
|
No |
No |
- Click Save & Finish and reopen the web component.
- Click Get Web Component Embed Code. Copy the code to the clipboard or a file.
- Include the code to generate an OAuth token in your app.
- Insert the embed code into the page/div where you want to display the web component in your app or web page, and update the variable for the OAuth token.
Sample Embed Code
See Embed an OAuth Web Component for more information and the Web Components view for the most up-to-date embed code. The following is an example embed for a Recognitions web component.
|
web component |
iframe |
|---|---|
|
Copy
|
Copy
|
See also