Salesforce Action Integration
There are three methods of transferring action data from Salesforce to Nitro. You can use one or more of the following depending on your program needs.
Workflow Rules
Salesforce Workflow Rules can be used for real-time action tracking by sending an Outbound Message. Workflow Rules are set up directly in the Salesforce administration UI. You add a Bunchball specific URL to the outbound message, which in turn loads activity data from Salesforce when data is received for a user that completes the activity.
To use Workflow Rules you must add a custom User ID field, add a custom action value field, and then set up Workflow Rules.
Add a Custom User ID Field Against Applicable Objects
For any objects that will be used as actions, a custom field for sending the user ID must be set up against each object. This provides ultimate flexibility in choosing which user ID to send to Nitro. The user ID field set up against each object will be a formula field referencing an applicable User ID needed for the integration. The following steps use “Leads” as the object in the example screens.
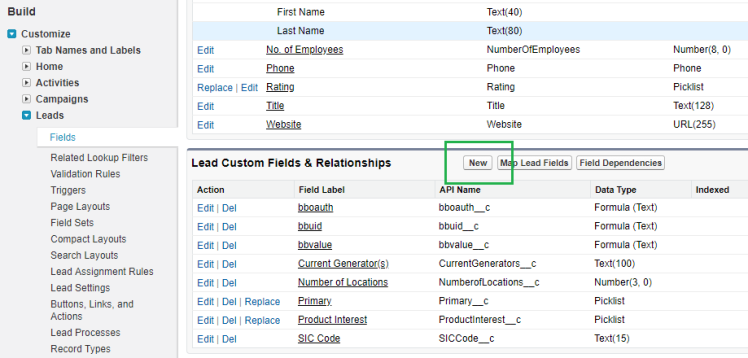
- In Salesforce, navigate to Build > Customize > [object name] > Fields, scroll to the [object name] Custom Fields & Relationships section, and click New. Show me

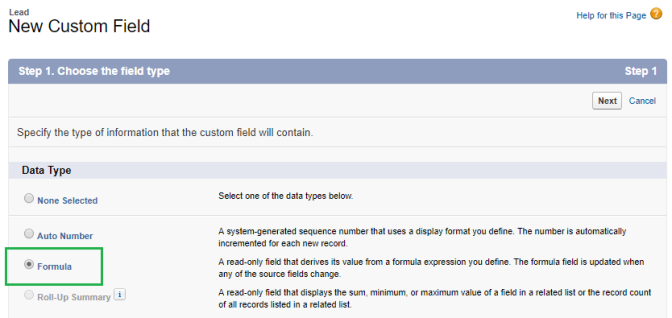
- In Step 1, select Formula, and click Next. Show me

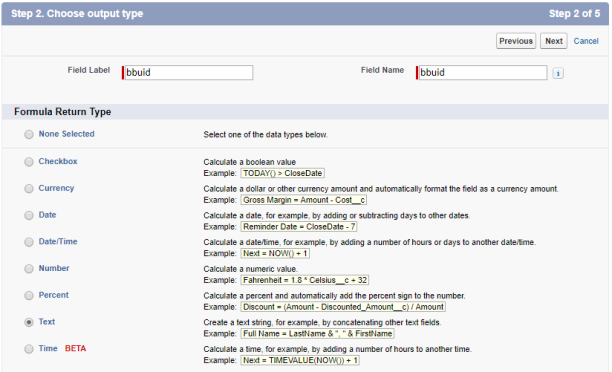
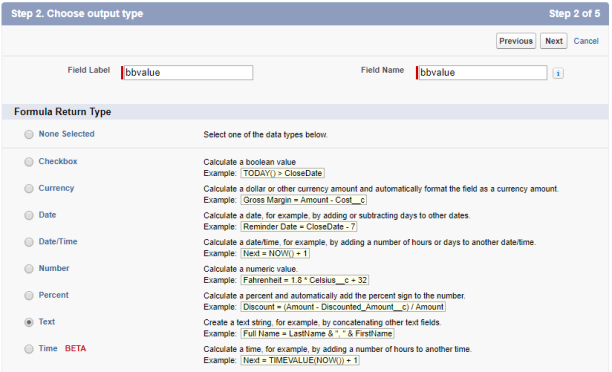
- In Step 2, enter bbuid as the Field Label and Field Name. Select Text as the Formula Return Type, and then click Next. Show me

 You must name the field "bbuid". The exact name is critical to the integration.
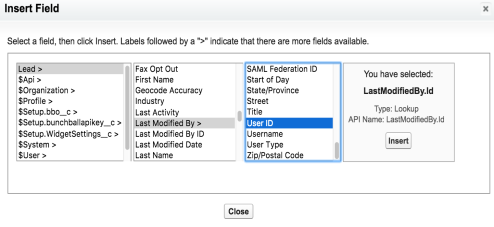
- In Step 3, click Insert Field.
- Select the object (Lead in this example), select Last Modified By, and then select the field that is used as the ID across all components of the Nitro integration (i.e. other systems outside of Salesforce). For example, User ID. Show me

- In the Blank Field Handling section, select Treat blank fields as zeroes. Show me

- Click Next.
- Select the object (Lead in this example), select Last Modified By, and then select the field that is used as the ID across all components of the Nitro integration (i.e. other systems outside of Salesforce). For example, User ID. Show me
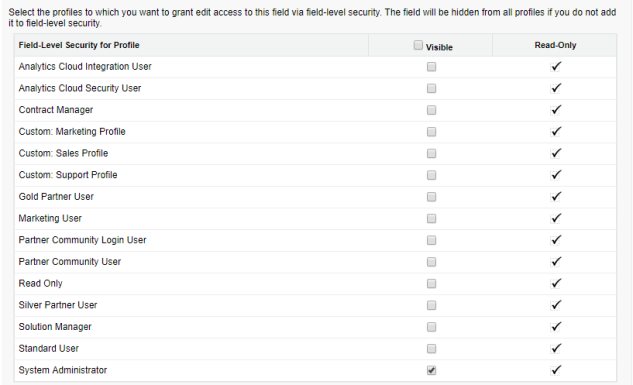
- In Step 4, remove visibility from all profiles except the System Administrator or any other admin related user. Click Next. Show me

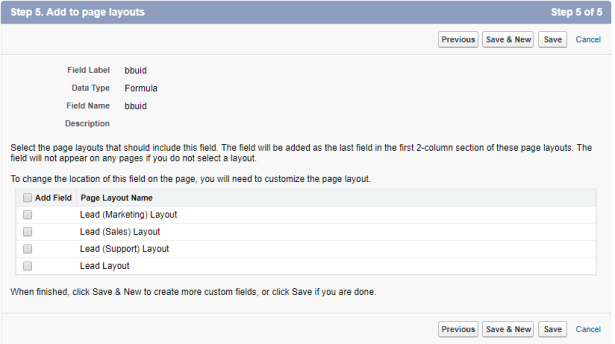
- In Step 5, remove all page layouts to ensure the field does not display on the object. Click Save. Show me

Add a Custom Action Value Field Against Applicable Objects
For any objects that will be used as actions, and also need an action value sent as per the program design, a custom field for sending the action value must be set up against each object. This is an optional field within the integration, but depending on your program setup, it may be required to drive the necessary rule sets within Nitro. This provides ultimate flexibility in choosing which action value to send to Nitro. The action value field set up against each object will be a formula field referencing another field on the object. The following steps use the “Leads” object with a revenue field as the action value in the example screens.
- In Salesforce, navigate to Build > Customize > [object name] > Fields, scroll to the [object name] Custom Fields & Relationships section, and click New. Show me

- In Step 1, select Formula, and click Next. Show me

- In Step 2, enter bbvalue as the Field Label and Field Name. Select Text as the Formula Return Type, and then click Next. Show me

 You must name the field "bbvalue". The exact name is critical to the integration.
- In Step 3, click Insert Field.
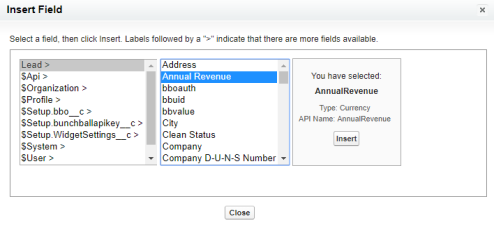
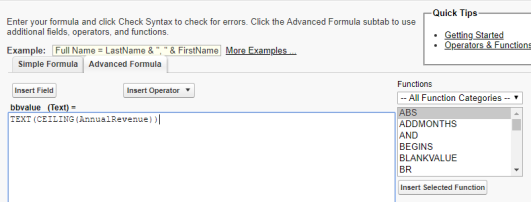
- Select the Lead > field (or any other parent field), select any applicable field that corresponds to the action value (i.e. Annual Revenue). Click Insert. Show me

Note: The action value field within Nitro only accepts integers. If the source field is not text, a function should be used to convert to text. Show me

- In the Blank Field Handling section, select Treat blank fields as zeroes. Show me

- Click Next.
- Select the Lead > field (or any other parent field), select any applicable field that corresponds to the action value (i.e. Annual Revenue). Click Insert. Show me
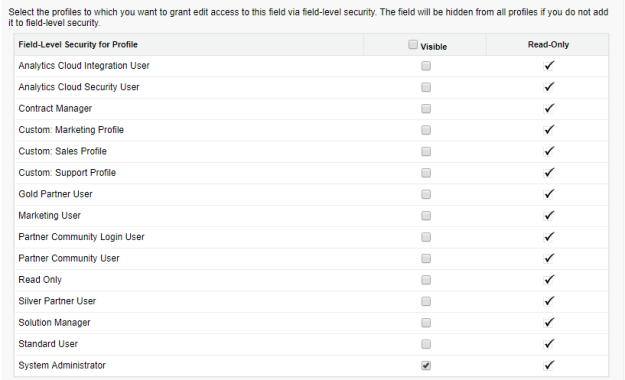
- In Step 4, remove visibility from all profiles except the System Administrator or any other admin related user. Click Next. Show me

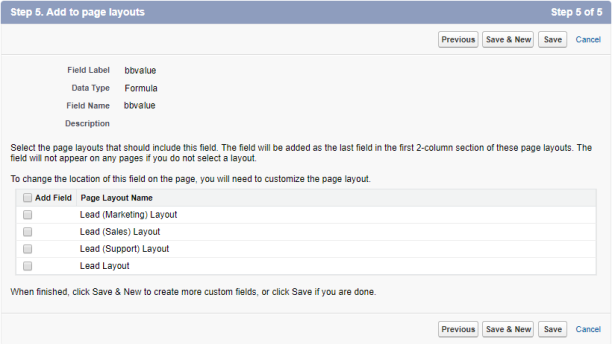
- In Step 5, remove all page layouts to ensure the field does not display on the object. Click Save. Show me

Set Up Workflow Rules
After adding custom User ID and action value fields, you can use those fields in Workflow Rules outbound messaging. The following steps detail how to set up an outbound message using Leads as the example object.
Note: You must create the Workflow Rule criteria with whatever criteria/logic is needed before setting up Workflow Rules. The following steps are only for Bunchball specific outbound messages. It's important to set up condition criteria on the Workflow Rule to ensure that your solution is in compliance for only licensed users. In addition, this avoids unnecessary traffic that is not applicable to the integrated solution.
- In Salesforce navigate to Build > Create > Workflow & Approvals > Outbound Messages > and click New Outbound Message.
- In Step 1, select the appropriate object (i.e. Lead), and click Next.
- In Step 2, enter the message details.
- Add a Name and Description that is meaningful to the outbound message.
- The Endpoint URL will be provided by Bunchball. It will have the action name, client ID, and secret key included as query parameters within the URL. For example, https://webhooks.qa.bunchball.com/?action=test-action&client_id=CLIENTID&client_secret=CLIENTSECRET. The URL structure/parameters are:
- Sandbox Base URL - https://webhooks.sandbox.bunchball.com
- Production Base URL - https://webhooks.bunchball.com
- action - Set to the action tag name set up in Nitro Studio > Activity > Actions.
- client_id - Set to the OAuth client ID obtained in Nitro Studio > Configuration > OAuth.
- client_secret - Set to the OAuth secret key obtained in Nitro Studio > Configuration > OAuth.
Note: The action tag, client_id, and client_secret values will be provided upon implementation.
- Set User to send as to an admin user that has permissions to send outbound messages.
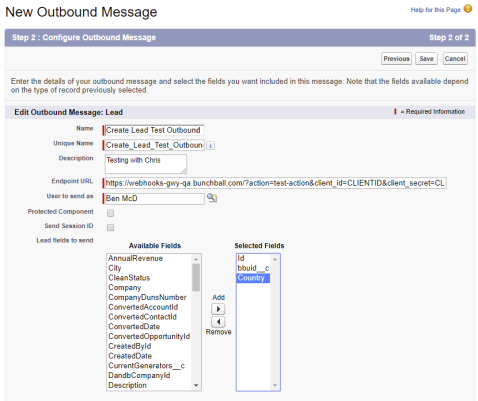
- Add bbuid_c in the [object] fields to send section. This is the custom field created for sending the User ID and is required for the integration. Optionally, you can send “bbvalue__c” as the action value. Then, add any other fields that will be needed as action metadata as per your program design. Show me

- Click Save.
Once complete, you have an outbound message that will fire when the Workflow Rule criteria is met. It will be sent to Nitro as an action for the user that triggered it.
Apex Triggers
Custom Apex triggers can be written within a Salesforce instance for complex activities that are not supported by Workflow Rules. The Apex code resides in the Salesforce instance and leverages native Nitro APIs to transfer data from Salesforce to Nitro. You can develop the Apex triggers, or request development by Bunchball within a professional services engagement.
Data Import
Data import is available as an easy method of transferring Salesforce activity data to Nitro. This can typically be done by leveraging Salesforce reporting options.
See also
