Example: Drive More Logins to the Site
The following steps describe how to drive more users to your site. This example will show you how to create a mission that requires users to comment on a post on a Wednesday and to pull a report showing if the mission increased site activity on that day.
Monday's are typically a common login day for many programs, so finding another day that you want users to log in and complete an activity will help you drive engagement throughout the week.
Create the Mission
- Open Motivate > Missions > New > Mission.
- In the New Mission modal:
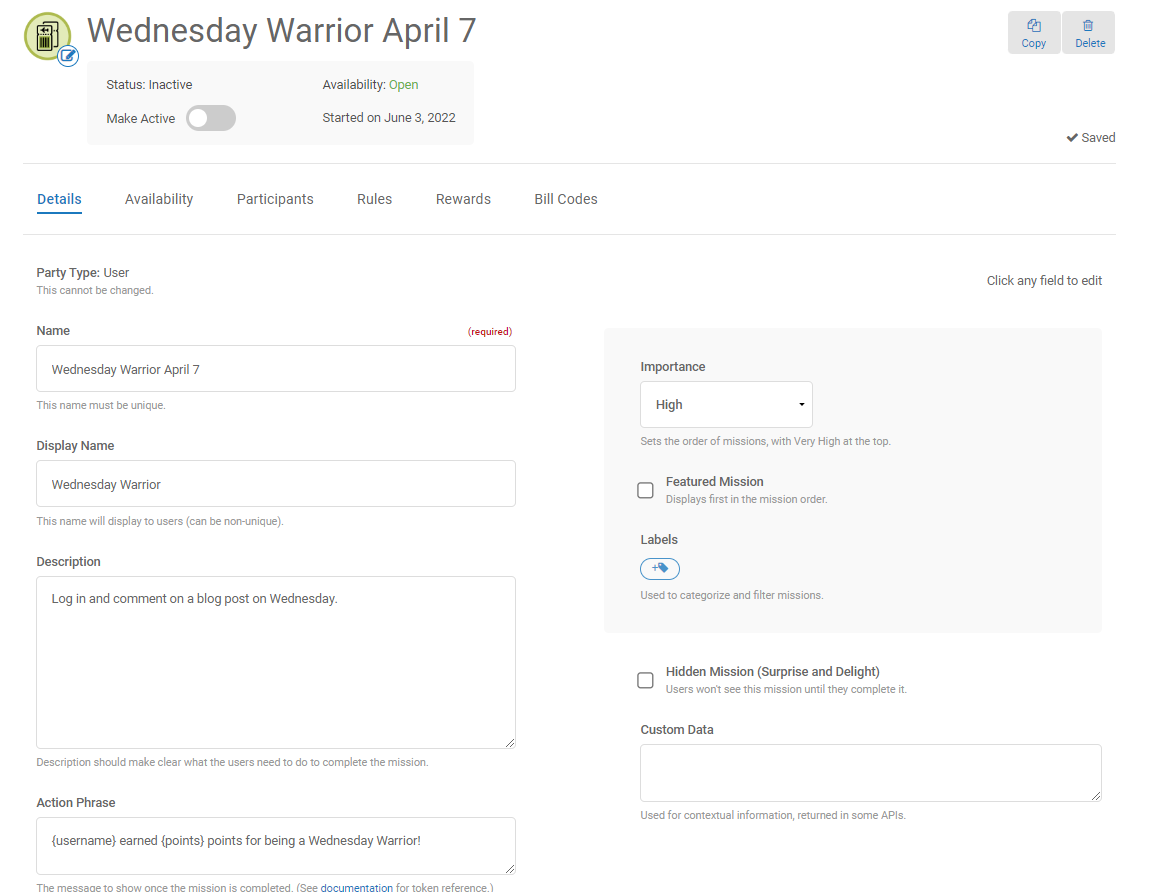
- In the Name field, enter Wednesday Warrior April 9.
- In the Display Name field, enter Wednesday Warrior.
- In the Description field, enter Log in and comment on a blog post on Wednesday.
- On the Details tab:
- In the Background Image field, add an image.
- Click Save.
Click the image to see this step
- On the Availability tab:
- In the Start Date field, enter 04/09/2025 12:01 AM.
- In the End Date field, enter 04/09/2025 11:59 PM.
- Click Save.
- On the Rules tab:
- Click New Rule, select Number of Actions, and then click Continue.
- In the number field, enter 1.
- In the Rule Description field, enter Comment on a blog post.
- Click New Action.
- In the Select Action field, search for the action used for commenting on a blog. In our example, this is COMMENT_BLOG.
- Click Save Action Criteria, then click Save for the rule.
- On the Rewards tab:
- Click Add a reward.
- In the Reward Type list, select Points.
- In the Amount field, enter 5, and click Save.
- In the header section, click Make Active.
Analyze the Results
After the mission completes, you can view the action data for the week of the mission.
- Open Analytics > Data Export > New.
- In the Name field, type Blog comments.
- In the Description field, type Track blog comments for the week of April 7th.
- In the What's In This Report section, select Transactional and Actions.
- Click the Schedule tab.
- Keep One-Time Report selected, and in the date fields enter the week of April 7th.
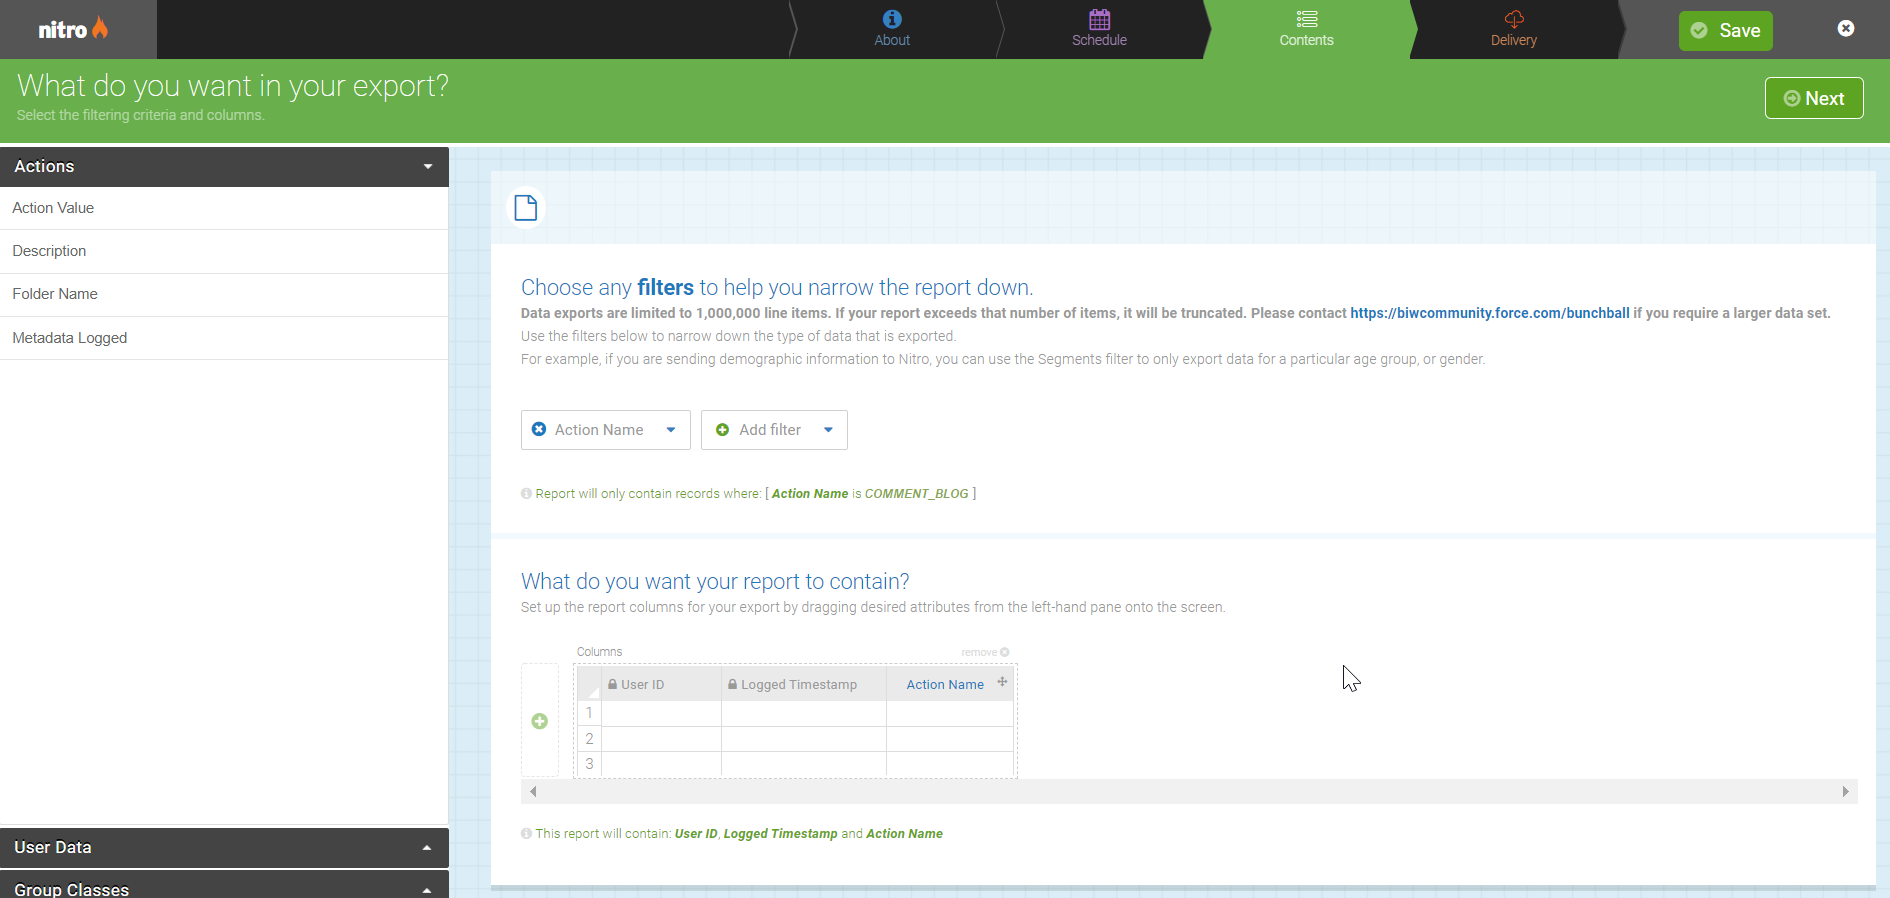
- Click the Contents tab.
- Drag and drop Action Name to the What do you want your report to contain? section.
- Click Add filter and then click Action name.
- Click Action Name (the filter button) and click COMMENT_BLOG and then click away from the filter list.
- Click the Delivery tab and add an email address for delivery.
- Open the delivered report, sort by timestamp, sum each day's action totals, and see if the actions completed were higher on Wednesday than other days that week.
Click the image to see the report setup on the Contacts tab
You can experiment with different days of the week and/or use different days to drive different activities.
See also